
Handcrafting Inspired by the Ocean Breeze!

Wednesday 19 November 2014
Tuesday 18 November 2014
The End of an Era!
This small crafts project started in 2009 as AEHandCrafts and a couple of friendly crochet teddy bears.
Last year, after some very big changes in my life, I decided to change the name of this project to L'Ana Banana Crafts and this blog, Crafter on the Shore, was born.
The time has come for a new change! It's the end of an era as L'Ana Banana and the start of something awesome! That's right, L'Ana Banana is re-branding! It will now be know as The Knitting Scientist and here's where you can find us:
New official blog on Wordpress, filled with all the free patterns and crafty goodies that you love!
http://theknittingscientist.wordpress.com/
Facebook Page - drop by and give your favourite scientist a like!
https://www.facebook.com/theknittingscientist
Pinterest, where you can find all the things that inspire me
http://www.pinterest.com/knittyscientist/
On Ravelry check out my latest WIP (work in progress)
http://www.ravelry.com/projects/KnittyScientist

Thank you for all the time we've spent together and hope to see you on the other side! ;)
 |
| Handmade crochet teddy bear by AEHandCrafts |
Last year, after some very big changes in my life, I decided to change the name of this project to L'Ana Banana Crafts and this blog, Crafter on the Shore, was born.
The time has come for a new change! It's the end of an era as L'Ana Banana and the start of something awesome! That's right, L'Ana Banana is re-branding! It will now be know as The Knitting Scientist and here's where you can find us:
New official blog on Wordpress, filled with all the free patterns and crafty goodies that you love!
http://theknittingscientist.wordpress.com/
Facebook Page - drop by and give your favourite scientist a like!
https://www.facebook.com/theknittingscientist
Pinterest, where you can find all the things that inspire me
http://www.pinterest.com/knittyscientist/
On Ravelry check out my latest WIP (work in progress)
http://www.ravelry.com/projects/KnittyScientist
Thank you for all the time we've spent together and hope to see you on the other side! ;)
Wednesday 29 October 2014
Same soul, different name
I am not a names person. When I'm introduced to someone, I never pay attention to their name but rather to their expressions and body language. I never get a name right on the first greet.
It's hard choosing a name. Whether it's for your pet, your child or your business, you always want it to be original, beautiful, meaningful... You want a name that is empowering and somehow reflects the subject's personality.
When I first started my little handcrafts business (if I can call it a business...), I went for a very blant and straightforward descriptive name: my initials and my product - AEHandcrafts. Ten points for description accuracy, null for creativity.
After doing some reading online and attending a few small business and online marketing seminars, I decided to change my branding name into something more creative, that reflected a bit more of my outgoing personality, that maintained a connection to my product and that allowed me some maneuver space in case I decided to expand into selling other stuff other than my handmade crafts. And I came up with my current brand name "L'Ana Banana Crafts". Because Ana is my first name and lana in spanish means wool, I figured it would be a nice word play. Ana Banana was what my childhood friends would call me, friendly teasing my name. So that would give it a more personal meaning. And crafts, well that needs no explaining.
Then I decided I needed a blog, as all online marketing experts will advise you to. I figured I would give my blog a different name from my brand, so I could give it a different tone. I didn't (and still don't) want a blog just to sell my things. I want to write a blog to engage and inspire people, to feel closer to other crafters or craft fans, to tell a bit of my story. "Kafka on the shore" is my favourite book from one of my favourite authors, Haruki Murakami. Funny enough, until the day I chose my blog name, I had never realised this, but I have been living in coastal cities all my life! Hence "Crafter on the Shore".
Some time ago I came up with another name, the perfect name, that name... THE name. A name that describes all my essence, my life, my story, all that I am. I wish I could just change everything immediately, but all these social websites have so many restrictions to name changes, it's discouraging... But I will start to work on it slowly. So don't be surprised if one day you visit me again (here on my blog or on any other related network) and you find a different name. It's the same soul, just a different name! :)
Friday 12 September 2014
Man's best friend
This free pattern can now be found at
http://theknittingscientist.wordpress.com/2014/11/18/mans-best-friend/
http://theknittingscientist.wordpress.com/2014/11/18/mans-best-friend/
Sunday 27 July 2014
A stocked up yarnsmith!
My new crochet hooks arrived this week, all the way from Britain! How exciting!!!
I now feel an accomplished crocheter, with all these amazing tools! I've already used the 10mm hook for my latest creation: an amazing scarlet scarf, made in new Australian wool and alpaca! Scrumptious piece! And amazing hooks! I can't wait to use them all!
With these and all the other tools I showed you in one of my recent posts, I am all geared up! And the same way there are blacksmiths and goldsmiths, I propose knitters and crocheters shall be known as yarnsmiths! eheh What do you reckon?
 |
| KnitPro Waves ergonomic crochet hooks. The full 19 hook set! |
I now feel an accomplished crocheter, with all these amazing tools! I've already used the 10mm hook for my latest creation: an amazing scarlet scarf, made in new Australian wool and alpaca! Scrumptious piece! And amazing hooks! I can't wait to use them all!
With these and all the other tools I showed you in one of my recent posts, I am all geared up! And the same way there are blacksmiths and goldsmiths, I propose knitters and crocheters shall be known as yarnsmiths! eheh What do you reckon?
Sunday 20 July 2014
The Perfect Crochet Hook
This is it! I have finally found it, the love of a lifetime, the perfect crochet hook!
If you are a regular follower of my blog, you know I have been on a quest to find the perfect crochet hook. In my previous post, I told you I had found the new Waves crochet hooks by KnitPro. It seemed to have a lot of potential and now that I have tried it, I must say it is nothing less than spectacular! Just as I expected, the metal shank is amazing, the yarn slides beautifully, just like with the Addi swing, but the handle feels much more ergonomic and it's smooth and so much lighter!
Today I weighed my crochet hooks, all size 4 mm and the results speak for themselves:
Pony - 5g
Bamboo - 2g
KnitPro Symfonie - 3g
Addi Swing - 19g
KnitPro Waves - 8g
For a crochet hook with an ergonomic handle, 8g is pretty good! It is less than half of the Addi. I have now ordered the full set: 19 crochet hooks, from size 2 mm to 12 mm. That's another tick on my wish list and I am now set for life with crochet hooks! I'm so excited just thinking of all the amazing things I will make with them!
 |
| Waves crochet hook by KnitPro |
If you are a regular follower of my blog, you know I have been on a quest to find the perfect crochet hook. In my previous post, I told you I had found the new Waves crochet hooks by KnitPro. It seemed to have a lot of potential and now that I have tried it, I must say it is nothing less than spectacular! Just as I expected, the metal shank is amazing, the yarn slides beautifully, just like with the Addi swing, but the handle feels much more ergonomic and it's smooth and so much lighter!
Today I weighed my crochet hooks, all size 4 mm and the results speak for themselves:
Pony - 5g
Bamboo - 2g
KnitPro Symfonie - 3g
Addi Swing - 19g
KnitPro Waves - 8g
For a crochet hook with an ergonomic handle, 8g is pretty good! It is less than half of the Addi. I have now ordered the full set: 19 crochet hooks, from size 2 mm to 12 mm. That's another tick on my wish list and I am now set for life with crochet hooks! I'm so excited just thinking of all the amazing things I will make with them!
Sunday 29 June 2014
Stocking up for Winter - Part 2: Tools
When I started this blog, I intended to write a new post at least every week. However, sometimes my life as a scientist gets in the way of my life as a knitter; I have pretty busy week days and on the weekends I just want to relax and enjoy life.
But when I get feedback from people, even if it's just a simple message saying that they like my work or read my blog, it reminds me of why I started this blog in the first place and gives me motivation and inspiration for another post. I don't think people realize how much difference they can make in a crafter's life. Just a simple hello when I open my email, a quick message on ravelry or a "like" or comment on my facebook page is enough to make my day. You, dear reader, you matter to me, you are important in my life. And I thank you for being here today, bothering to read these words.
Anyway, mushiness aside! Today I am here to tell you about crafting tools. Tools can make all the difference. A quality tool will contribute for a quality work and make you enjoy it more while you're at it. So, if you're a regular knitter or crocheter, do not be afraid of investing in a better more expensive tool. It will last you longer and make your hobby more enjoyable.
If you've been following my blog, you already know that I am a big fan of KnitPro. You got to love a brand that puts such a big effort in making good knitting/crocheting tools! One of my biggest investments was buying their birch wood interchangeable knitting needle set and it was worth it! The set is so versatile, with all the different knitting needle sizes and cables, that I am set for life! Then I discovered their cubic double pointed needles. I love knitting with double pointed needles (dnps). The first time I saw it was in a book that I bought on amazon to make knitted dolls. My first thoughts were "I am never going to be able to do this!". But I loved the dolls so much that I set my mind to learn it - I love a good challenge! From then on, I use my dpns whenever I can! I find that it's easier to knit with dpns than circular needles and it looks very daunting to other people, so it makes me look like an expert (ahah!). Recently, after reading a great review on the cubic dpns by KnitPro, I just had to try them. And it is everything good they say! They are amazing to work with, they stack on each other making it easier to work on those starting rows without twisting them, the needles don't fall off the stitches (which happened to me a lot in the beginning) and it's also easier to store your work when you pause. And of course, as KnitPro has accustomed us, they are light and the yarn slides beautifully! Unfortunately, KnitPro has not made a set for these needles, so I've been making my own set - stocking up! - with different sizes of needles and different lengths.
In one of my recent posts, I told you about my quest to find the perfect crochet hook. I've been sticking with my good old Pony hooks but I am still hopeful! Yesterday I just found a very promising crochet hook, by KnitPro of course! I discovered their new Waves crochet hooks - aluminium hooks with a soft grip. I am hoping the yarn slides easily on the metal like on the Addi Swing hooks, but the handle is lighter and feels more comfortable. I have ordered one of these hooks to try it out and if they're good, I'll definitely buy the whole kit! I am really excited about these hooks and I will let you know how it turned out! (Disclaimer: I am not in any way sponsored by KnitPro, I am just a user and a big fan and believe their effort in quality should be given credit for).
You will notice that besides the crochet hooks and the knitting needles I have included in my tools list a wooden spoon. That's because to me crafting also happens in the kitchen - Cooking is the most noble of all Arts! I know nowadays all the food safety standards require non-wooden spoons, but it's my party and I'll use them if I want to! In what's related to cooking, I still prefer the good old traditional way and I am very attached to my wooden spoons.
But when I get feedback from people, even if it's just a simple message saying that they like my work or read my blog, it reminds me of why I started this blog in the first place and gives me motivation and inspiration for another post. I don't think people realize how much difference they can make in a crafter's life. Just a simple hello when I open my email, a quick message on ravelry or a "like" or comment on my facebook page is enough to make my day. You, dear reader, you matter to me, you are important in my life. And I thank you for being here today, bothering to read these words.
Anyway, mushiness aside! Today I am here to tell you about crafting tools. Tools can make all the difference. A quality tool will contribute for a quality work and make you enjoy it more while you're at it. So, if you're a regular knitter or crocheter, do not be afraid of investing in a better more expensive tool. It will last you longer and make your hobby more enjoyable.
If you've been following my blog, you already know that I am a big fan of KnitPro. You got to love a brand that puts such a big effort in making good knitting/crocheting tools! One of my biggest investments was buying their birch wood interchangeable knitting needle set and it was worth it! The set is so versatile, with all the different knitting needle sizes and cables, that I am set for life! Then I discovered their cubic double pointed needles. I love knitting with double pointed needles (dnps). The first time I saw it was in a book that I bought on amazon to make knitted dolls. My first thoughts were "I am never going to be able to do this!". But I loved the dolls so much that I set my mind to learn it - I love a good challenge! From then on, I use my dpns whenever I can! I find that it's easier to knit with dpns than circular needles and it looks very daunting to other people, so it makes me look like an expert (ahah!). Recently, after reading a great review on the cubic dpns by KnitPro, I just had to try them. And it is everything good they say! They are amazing to work with, they stack on each other making it easier to work on those starting rows without twisting them, the needles don't fall off the stitches (which happened to me a lot in the beginning) and it's also easier to store your work when you pause. And of course, as KnitPro has accustomed us, they are light and the yarn slides beautifully! Unfortunately, KnitPro has not made a set for these needles, so I've been making my own set - stocking up! - with different sizes of needles and different lengths.
In one of my recent posts, I told you about my quest to find the perfect crochet hook. I've been sticking with my good old Pony hooks but I am still hopeful! Yesterday I just found a very promising crochet hook, by KnitPro of course! I discovered their new Waves crochet hooks - aluminium hooks with a soft grip. I am hoping the yarn slides easily on the metal like on the Addi Swing hooks, but the handle is lighter and feels more comfortable. I have ordered one of these hooks to try it out and if they're good, I'll definitely buy the whole kit! I am really excited about these hooks and I will let you know how it turned out! (Disclaimer: I am not in any way sponsored by KnitPro, I am just a user and a big fan and believe their effort in quality should be given credit for).
 |
| My crafting tools |
You will notice that besides the crochet hooks and the knitting needles I have included in my tools list a wooden spoon. That's because to me crafting also happens in the kitchen - Cooking is the most noble of all Arts! I know nowadays all the food safety standards require non-wooden spoons, but it's my party and I'll use them if I want to! In what's related to cooking, I still prefer the good old traditional way and I am very attached to my wooden spoons.
Saturday 7 June 2014
Stocking up for Winter: Yarn!
Winter has officially started here in my part of the world, both in the calendar and in the feel. Days are much shorter, colder and rainy weekends are frequent. So I've been stocking up in advance for those weekends that are just perfect to stay at home wrapped up in a warm cosy blankie, with a nice hot cuppa' and a fun knitting or crochet project.
I have yarn, of course. In fact, I have lots of yarn and I always feel it is not enough. I cannot resist a gorgeous luxury yarn, with alpaca, angora or silk. I usually get my alpaca and angora yarns from Ice Yarns. Although shipping expenses tend to be high, their yarn is reasonably priced and in the end you pay less than if you bought them in a shop because, for some reason, yarn is super expensive here in Australia. Their yarns are nice and soft and the colours are so amazing that it's difficult to choose!!! Sometimes I go crazy (well... actually more often than I would like to admit!) and just get one each colour. I like the self-striping yarns particularly.
As for silk, I recently bought the most amazing hand dyed mulberry silk yarn from Ann Collins. It is variegated in beautiful sunset tones of red and orange. In fact, it is so amazing that I feel I cannot find that just perfect pattern to use it. The yarn, however, comes with instructions to make two nice lace knitted scarves. Maybe I'll give them a go and take the chance to improve my knitting skills.
I am also a big fan of a nice sheep wool. I usually prefer merino wool as it's usually softer and more shiny. I am completely and uttermost in love with Malabrigo Sock but haven't been able to find it in any stores. And what about buying beautiful yarn and helping a kitty cat? That's what Ancient Arts and the Meow Foundation have done, and I must say in a most successful way. I wish I could buy one of each! Can you imagine having a nice shawl with the colours of your favourite kitty? Or all of your favourite kitties!!! I love cats so much I don't think I can decide on only one...
Well that was my yarn indulgence for this Winter. I've also been stocking up on kitting tools, but I'll leave that for another post (hopefully to be written soon!).
I have yarn, of course. In fact, I have lots of yarn and I always feel it is not enough. I cannot resist a gorgeous luxury yarn, with alpaca, angora or silk. I usually get my alpaca and angora yarns from Ice Yarns. Although shipping expenses tend to be high, their yarn is reasonably priced and in the end you pay less than if you bought them in a shop because, for some reason, yarn is super expensive here in Australia. Their yarns are nice and soft and the colours are so amazing that it's difficult to choose!!! Sometimes I go crazy (well... actually more often than I would like to admit!) and just get one each colour. I like the self-striping yarns particularly.
As for silk, I recently bought the most amazing hand dyed mulberry silk yarn from Ann Collins. It is variegated in beautiful sunset tones of red and orange. In fact, it is so amazing that I feel I cannot find that just perfect pattern to use it. The yarn, however, comes with instructions to make two nice lace knitted scarves. Maybe I'll give them a go and take the chance to improve my knitting skills.
 |
| Hand dyed Mulberry Silk yarn by Ann Collins |
I am also a big fan of a nice sheep wool. I usually prefer merino wool as it's usually softer and more shiny. I am completely and uttermost in love with Malabrigo Sock but haven't been able to find it in any stores. And what about buying beautiful yarn and helping a kitty cat? That's what Ancient Arts and the Meow Foundation have done, and I must say in a most successful way. I wish I could buy one of each! Can you imagine having a nice shawl with the colours of your favourite kitty? Or all of your favourite kitties!!! I love cats so much I don't think I can decide on only one...
Well that was my yarn indulgence for this Winter. I've also been stocking up on kitting tools, but I'll leave that for another post (hopefully to be written soon!).
Saturday 3 May 2014
Tools of the Trade - Part 2: Crochet Hooks
There's nothing like staying home with a nice hot cup of tea on those cold and cloudy Autumn days, just like today! And to make it perfect, add a nice ball of wool and a crochet hook and you're set for the day! That's exactly what I'll be writing you about today: crochet hooks.
First of all, lets have a look at the crochet hook anatomy.
There are lots of crochet hooks in the market. Different sizes, different shapes, different materials - metal, plastic, wood, coated, uncoated... As a crocheter with almost a decade of experience, I've tried my share of crochet hooks and decided to make a review of what I've learned over the years (and money spent).
I first learned to filet crochet using cotton thread and the traditional silvered metal hook. These were probably the only hooks that our great grannies ever knew and I still think they are the best to crochet with thread, as long as they are good quality stainless steel. If you have sweaty palms like I do, trust me, you do not want a crochet hook that easily rusts.
After I gained confidence with filet crochet, I ventured into the wonderful world of crochet with yarn and my life was never the same! I was amazed with the variety of things I could do and all the luxurious yarns I could work with (my savings were never the same either...). For this, I used steel hooks coated with plastic, the best two brands I tried being Pony and Prym. But these hooks, although being good, they look so dull... All crocheters love colour, don't these look much more appealing? Yes they do! Bright and color coded, a treat for your eyes. But the truth is, they are not a treat to work with. Because they are made of aluminium, they are cheap and light (and that's good), but you will find bits of unfinished aluminium where your yarn will most certainly be stuck. So annoying! Don't judge a hook by it's color!
After the brightly colored aluminium hooks disappointment, I decided to stick with my Pony hooks until recently I was finally ready to try something new again. My new adventure started with a bamboo hook when I was flying over to Australia. I thought that being wood it would a) not be seen by the X-Rays in the airports and/or b) if it was seen on the X-Rays, it looks much less threatening than a steel hook. I was also pleasantly surprised when using it: it's much lighter than the steel hooks and the yarn glides nicely. But still there is something I cannot explain that does not satisfy me.
In my quest to find the perfect crochet hook, and since I am an unconditional fan of Knit Pro birch wood knitting needles, I decided to try their crochet hooks. I was not impressed. The hook is really light, as you would expect from a wooden hook, the yarn slides beautifully, just like only Knit Pro Symfonie has accustomed us, the head is nice and just enough pointy to go through the stitches smoothly, but the lip is too low, making the thread guide too deep and gasping the yarn constantly.
Going back to colorful crochet hooks, what to say about Addi Swing Hooks! They came into the market claiming to be ergonomic turbo hooks. It is true that the yarn just glides away smoothly but the handle is all but ergonomic. It's a very very heavy crochet hook and it's probably ergonomic only for knife gripping crocheters. Being a pencil gripper, my hand feels tired and cramping after just a few stitches. It feels like I'm doing something wrong, that I am using it the wrong way. Big no-no to Addi Swing hooks.
Also on the ergonomic range, and because I am not getting any younger, I tried briefly the Clover Soft Touch Crochet Hook. It's a light hook (nothing compared to Addi's) but the plastic handle again feels very little ergonomic. It kind of stands in the way and hurts the side of my middle finger the way I grab it. This might be more of a user problem than a tool problem, it might be worth to give it another try.
So all in all, after all these attempts to find the perfect crochet hook, I must confess: there is nothing like my good old Pony crochet hook!
First of all, lets have a look at the crochet hook anatomy.
 |
| Anatomy of a crochet hook by Nancy Nehring @ Lace Buttons (http://lacebuttons.com/?page_id=670) |
There are lots of crochet hooks in the market. Different sizes, different shapes, different materials - metal, plastic, wood, coated, uncoated... As a crocheter with almost a decade of experience, I've tried my share of crochet hooks and decided to make a review of what I've learned over the years (and money spent).
I first learned to filet crochet using cotton thread and the traditional silvered metal hook. These were probably the only hooks that our great grannies ever knew and I still think they are the best to crochet with thread, as long as they are good quality stainless steel. If you have sweaty palms like I do, trust me, you do not want a crochet hook that easily rusts.
After I gained confidence with filet crochet, I ventured into the wonderful world of crochet with yarn and my life was never the same! I was amazed with the variety of things I could do and all the luxurious yarns I could work with (my savings were never the same either...). For this, I used steel hooks coated with plastic, the best two brands I tried being Pony and Prym. But these hooks, although being good, they look so dull... All crocheters love colour, don't these look much more appealing? Yes they do! Bright and color coded, a treat for your eyes. But the truth is, they are not a treat to work with. Because they are made of aluminium, they are cheap and light (and that's good), but you will find bits of unfinished aluminium where your yarn will most certainly be stuck. So annoying! Don't judge a hook by it's color!
After the brightly colored aluminium hooks disappointment, I decided to stick with my Pony hooks until recently I was finally ready to try something new again. My new adventure started with a bamboo hook when I was flying over to Australia. I thought that being wood it would a) not be seen by the X-Rays in the airports and/or b) if it was seen on the X-Rays, it looks much less threatening than a steel hook. I was also pleasantly surprised when using it: it's much lighter than the steel hooks and the yarn glides nicely. But still there is something I cannot explain that does not satisfy me.
In my quest to find the perfect crochet hook, and since I am an unconditional fan of Knit Pro birch wood knitting needles, I decided to try their crochet hooks. I was not impressed. The hook is really light, as you would expect from a wooden hook, the yarn slides beautifully, just like only Knit Pro Symfonie has accustomed us, the head is nice and just enough pointy to go through the stitches smoothly, but the lip is too low, making the thread guide too deep and gasping the yarn constantly.
Going back to colorful crochet hooks, what to say about Addi Swing Hooks! They came into the market claiming to be ergonomic turbo hooks. It is true that the yarn just glides away smoothly but the handle is all but ergonomic. It's a very very heavy crochet hook and it's probably ergonomic only for knife gripping crocheters. Being a pencil gripper, my hand feels tired and cramping after just a few stitches. It feels like I'm doing something wrong, that I am using it the wrong way. Big no-no to Addi Swing hooks.
Also on the ergonomic range, and because I am not getting any younger, I tried briefly the Clover Soft Touch Crochet Hook. It's a light hook (nothing compared to Addi's) but the plastic handle again feels very little ergonomic. It kind of stands in the way and hurts the side of my middle finger the way I grab it. This might be more of a user problem than a tool problem, it might be worth to give it another try.
So all in all, after all these attempts to find the perfect crochet hook, I must confess: there is nothing like my good old Pony crochet hook!
Sunday 13 April 2014
Crafter in the Park
This little crafter has moved to the park!
Although still quite close to the shore, I now live surrounded by a beautiful green landscape with centennial trees, waking up to the sound of the magpies and the miner birds!
I've been trying to get some nice pictures but unfortunately the weather hasn't been kind. I leave you with a picture of the view to the city from my balcony and a promise to get back to a more frequent posting!
Monday 24 March 2014
Reefs and Crochet: the story of my life!

Sometimes (almost always, I would say...) a picture says more than a thousand words.

This work was made possible by more than 350 contributors around Australia.

And it aims to call to attention the urgent need to protect the Great Barrier Reef,
one of the most biodiverse places in our planet.

These amazing masterpieces can be found in the Customs House in Sydney, Australia,
until the 30th of March 2014.

To all the contributors, my most heartfelt thank you, both as a marine scientist and a crafter.
Saturday 8 March 2014

Saturday 15 February 2014
Free Small Messenger Bag Tutorial
Everybody needs a small messenger bag to fit just a few basic necessities when going on a quick groceries shopping or a stroll in the park. I made it for myself and I though it turned out so adorable that I wanted to share it with you.
This tutorial is suited for any beginner - I am a beginner as well. However you do need to have basic knowledge in techniques such as cutting fabric pieces, pinning pieces together, making bias tape, interfacing, top stitch, etc. You can find nice tutorials for these techniques all over the internet. Or you can email me and I'll try to give you a hand :)
NOTES:
1- I like to make my bags using sturdy fabrics suited for furnishings. If you prefer to use quilting fabrics, you will need to interface all pieces of the bag except the lining.
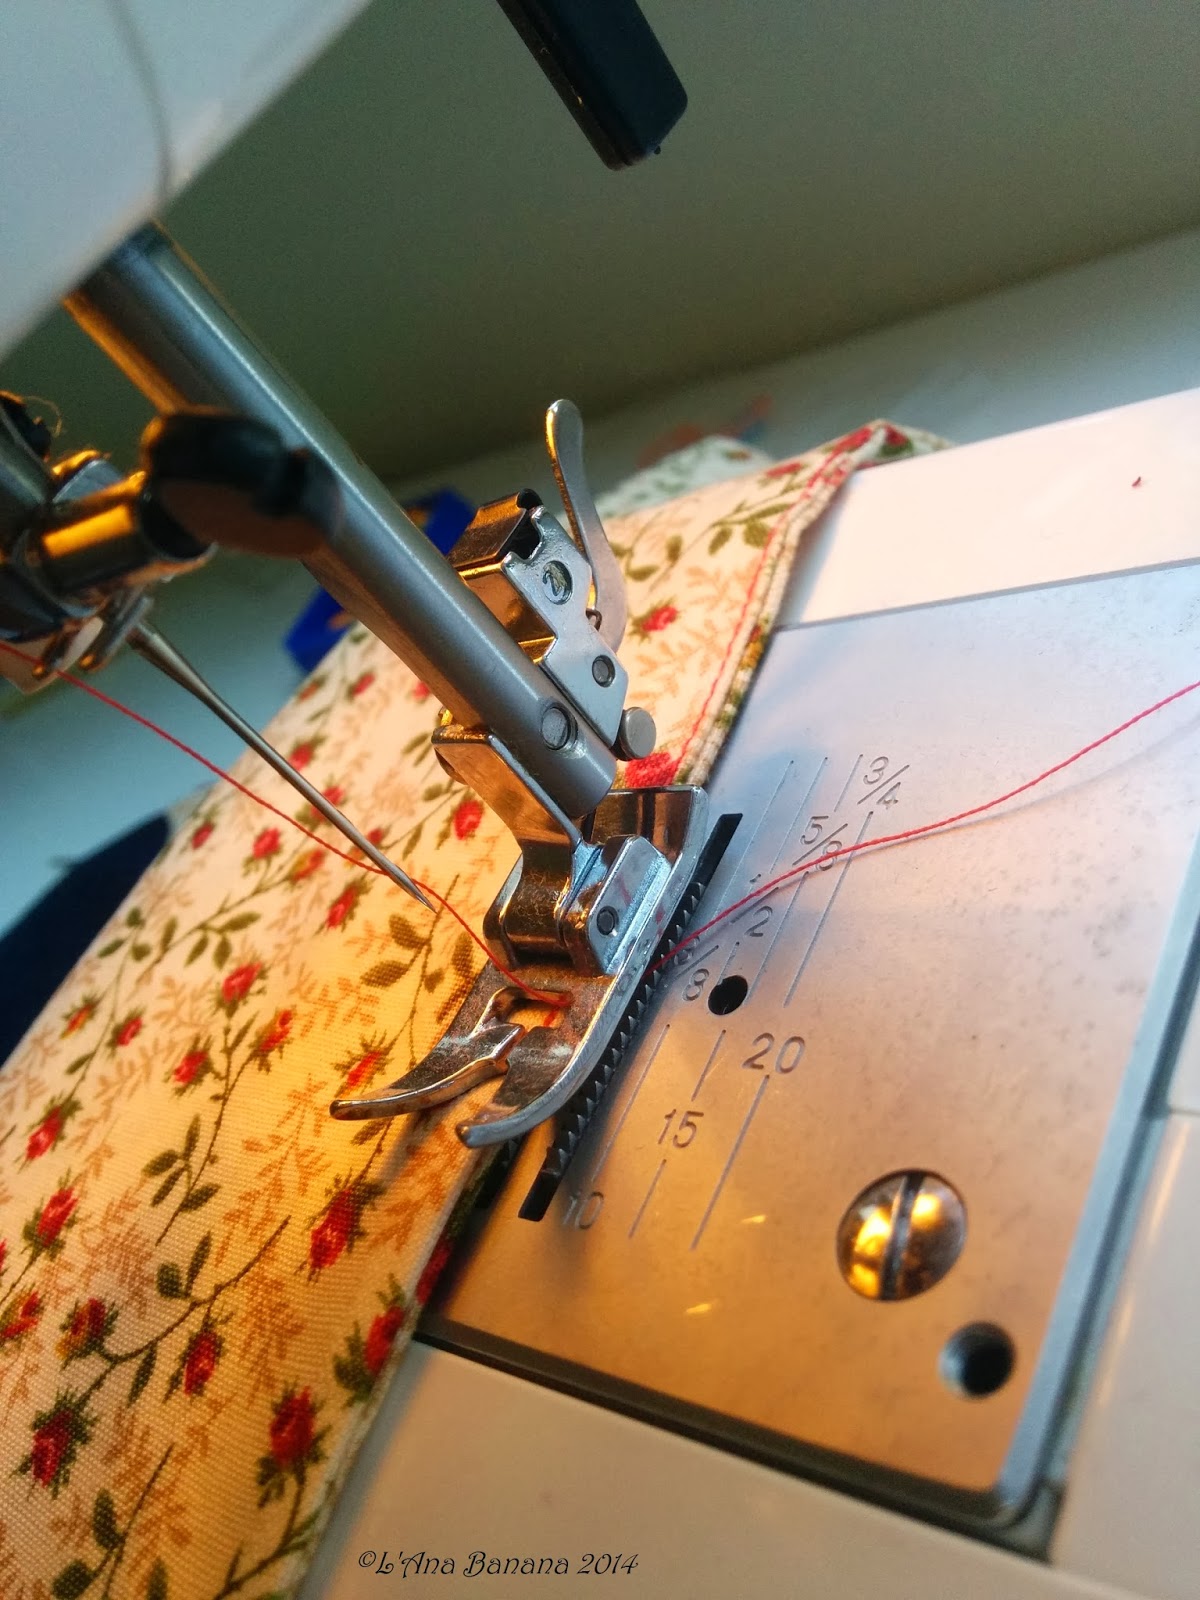
2- If using denim (like I did) don't forget to use the right sewing machine needle.
3- If using iron on interfacing, do it with steam off and let it cool before cutting.
4- The flap covers up the bag opening nicely. Button hole is optional if you feel you do not need a more secure closing.
5- All seam allowances are 1/4 in (1 cm).
SKILL LEVEL: Beginner with basic sewing notions
MATERIALS

2x Outer Bag 9.5x11.5 in (I used denim)
2x Lining 9.5x11.5 in (I used quilting fabric)
1x Outer/Front Flap (download cutting template here; print in A3 format)
1x Inner/Back Flap (cut according to template on wrong side)
1x Strap 44x4 in
1x Button hole 5x2 in
1 Big button
Heavy or Medium weight interfacing, depending on the fabric you use
Scissors
Rotary cutter & mat
Ruler
Alright!!!! Lets get to business!!!
PIC TUTORIAL
Main Bag
1- Iron all pieces and interface outer bag pieces if needed

2- Join the two outer bag pieces right sides together and iron. Sew the sides first and then the bottom. Trim the corners with a sharp scissors.


3- Repeat for lining pieces but leave a small opening at the bottom.


Flap:
4- Interface outer flap piece: place interface piece bigger than flap and iron on the wrong side with steam off; let it cool and cut all around.

Steps 5, 6 and 7 are optional:
5- Iron the button hole piece like a bias tape and top stitch on both sides.

6- Fold button hole piece in half like in the picture and center it over the front flap piece.

7- Pin button hole piece in place from the wrong side and overlay with back flap piece.

8- Pin the flap pieces together and sew along the sides and bottom leaving the top seam open.


9- Trim the button hole and round corners all around.


10- Turn the flap right side out and iron. Here's your beautiful bag flap!

Strap:
11- Iron all along the strap piece like you did for the button hole strip (like a bias tape) and top stitch on both sides.


12- Turn main bag piece right side out and pin strap ends to the back of the bag (be careful to pin and sew to back piece of main bag only and not through both pieces!).

13- Sew in place with reinforced seams.


Bag Construction:
14- Pin flap to the back of the main bag over the strap, with front flap facing the bag and back flap facing you (again, pin to the back piece only!).


15- Sew in place to the back piece only!

16- Insert the whole construction (as is!) into the lining.

17- Pin top seams matching the side seams together and sew all around the top opening.


18- Pull the main bag, strap and flap piece through the little opening on the bottom of the lining that you made on step 3, turning the lining right side out too.

19- Iron lining and top stitch the little opening to close it.

20- Insert the lining inside the bag and iron well all around the opening to flatten it up and all the rest of the bag.

AND....

TARAAAAAAAAAANNN!!!! Here's your beautiful bag!

I've done an extensive effort in reviewing this tutorial several times but if you feel that something isn't right or understandable, please let me know.
You can download this tutorial in PDF format here.
If you enjoyed this tutorial, please leave your feedback bellow and feel free to share it.
I would love to see your finished bag! Just leave a pic or a link in the comments section or show off in my facebook page.
Finished bag also fits a nice book to take along in your stroll in the park. Enjoy! ;)
Copyrights: you may distribute this pattern freely among your friends, you can translate it in your own language, you can use it as material for crafts lessons or crochet groups. You may NOT sell this pattern, translations or a similar pattern with minor alterations that can be considered corrections. You can also sell the finished items. Please credit L'Ana Banana with a link to this blog. Thank you! :)
This tutorial is suited for any beginner - I am a beginner as well. However you do need to have basic knowledge in techniques such as cutting fabric pieces, pinning pieces together, making bias tape, interfacing, top stitch, etc. You can find nice tutorials for these techniques all over the internet. Or you can email me and I'll try to give you a hand :)
NOTES:
1- I like to make my bags using sturdy fabrics suited for furnishings. If you prefer to use quilting fabrics, you will need to interface all pieces of the bag except the lining.
2- If using denim (like I did) don't forget to use the right sewing machine needle.
3- If using iron on interfacing, do it with steam off and let it cool before cutting.
4- The flap covers up the bag opening nicely. Button hole is optional if you feel you do not need a more secure closing.
5- All seam allowances are 1/4 in (1 cm).
SKILL LEVEL: Beginner with basic sewing notions
MATERIALS
2x Outer Bag 9.5x11.5 in (I used denim)
2x Lining 9.5x11.5 in (I used quilting fabric)
1x Outer/Front Flap (download cutting template here; print in A3 format)
1x Inner/Back Flap (cut according to template on wrong side)
1x Strap 44x4 in
1x Button hole 5x2 in
1 Big button
Heavy or Medium weight interfacing, depending on the fabric you use
Scissors
Rotary cutter & mat
Ruler
Alright!!!! Lets get to business!!!
PIC TUTORIAL
Main Bag
1- Iron all pieces and interface outer bag pieces if needed
2- Join the two outer bag pieces right sides together and iron. Sew the sides first and then the bottom. Trim the corners with a sharp scissors.
3- Repeat for lining pieces but leave a small opening at the bottom.
Flap:
4- Interface outer flap piece: place interface piece bigger than flap and iron on the wrong side with steam off; let it cool and cut all around.
Steps 5, 6 and 7 are optional:
5- Iron the button hole piece like a bias tape and top stitch on both sides.
7- Pin button hole piece in place from the wrong side and overlay with back flap piece.
8- Pin the flap pieces together and sew along the sides and bottom leaving the top seam open.
9- Trim the button hole and round corners all around.
10- Turn the flap right side out and iron. Here's your beautiful bag flap!
Strap:
11- Iron all along the strap piece like you did for the button hole strip (like a bias tape) and top stitch on both sides.
12- Turn main bag piece right side out and pin strap ends to the back of the bag (be careful to pin and sew to back piece of main bag only and not through both pieces!).
13- Sew in place with reinforced seams.
Bag Construction:
14- Pin flap to the back of the main bag over the strap, with front flap facing the bag and back flap facing you (again, pin to the back piece only!).
15- Sew in place to the back piece only!
16- Insert the whole construction (as is!) into the lining.
17- Pin top seams matching the side seams together and sew all around the top opening.
18- Pull the main bag, strap and flap piece through the little opening on the bottom of the lining that you made on step 3, turning the lining right side out too.
19- Iron lining and top stitch the little opening to close it.
20- Insert the lining inside the bag and iron well all around the opening to flatten it up and all the rest of the bag.
AND....
TARAAAAAAAAAANNN!!!! Here's your beautiful bag!
I've done an extensive effort in reviewing this tutorial several times but if you feel that something isn't right or understandable, please let me know.
You can download this tutorial in PDF format here.
If you enjoyed this tutorial, please leave your feedback bellow and feel free to share it.
I would love to see your finished bag! Just leave a pic or a link in the comments section or show off in my facebook page.
Finished bag also fits a nice book to take along in your stroll in the park. Enjoy! ;)
Copyrights: you may distribute this pattern freely among your friends, you can translate it in your own language, you can use it as material for crafts lessons or crochet groups. You may NOT sell this pattern, translations or a similar pattern with minor alterations that can be considered corrections. You can also sell the finished items. Please credit L'Ana Banana with a link to this blog. Thank you! :)
Thursday 30 January 2014
I Love Pinterest
I hereby confess myself completely and uttermost addicted to Pinterest.
Sometimes when I'm tired, stressed or just had a rough day at work (or all of the above), I just feel like coming home, relax and look at beautiful things. And Pinterest never disappoints me. I just click that little red magic button and my world is flooded with gorgeous creations, detailed tutorials and precious information. And sometimes that's just all you need to believe that tomorrow will be a better day!
So just pop by and say hi! I'd love to share my Pinterest treasures with you!
http://www.pinterest.com/aiesteves/
Tomorrow will definitely be a better day! :)
Sometimes when I'm tired, stressed or just had a rough day at work (or all of the above), I just feel like coming home, relax and look at beautiful things. And Pinterest never disappoints me. I just click that little red magic button and my world is flooded with gorgeous creations, detailed tutorials and precious information. And sometimes that's just all you need to believe that tomorrow will be a better day!
 |
| A glimpse on my Pinterest boards |
So just pop by and say hi! I'd love to share my Pinterest treasures with you!
http://www.pinterest.com/aiesteves/
Tomorrow will definitely be a better day! :)
Monday 27 January 2014
All the colours of the rainbow!
♫ "These boots are made for walking
and that's just what they'll do
One of these days these boots
are gonna walk all over you..." ♫

and that's just what they'll do
One of these days these boots
are gonna walk all over you..." ♫
I absolutely LOVE crocodile stitch! :)
Subscribe to:
Posts (Atom)